
Spring REST Exception Handling
Introduction
Like in any other field, API development is also prone to errors. We might encounter undesired outputs while working with web services. The success of a developer lies in handing these errors gracefully. This is one of the main topics that a web service developer must understand. In this article, we will be discussing how the Spring framework handles REST API exceptions.
Spring Boot Exception Handling
The below-given diagram will provide an overview of the exception handling process in the Spring Boot environment.
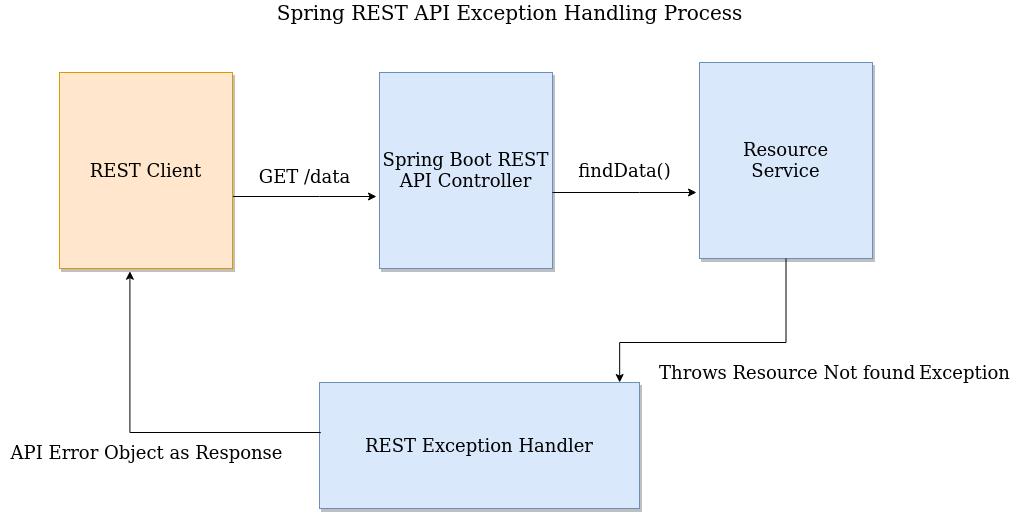
Usually, the default response for any error would be an HTTP 500-Internal Server Error message to the client. This wouldn’t be the right message that a client would want to see. We can make the message to the client more verbose and with proper HTTP status codes so that it won’t create any panic.
Types of exception handling
There are mainly three ways in which Spring Boot exceptions are handled.
- Using Http Status Codes with Response Entity
- Using @ExceptionHandler Annotation
- Custom exception class with @ResponseStatus
Let us have a look into each of these in detail:
Using Http Status Codes with Response Entity
As we have said, the default error response would be to throw an HTTP 500- Internal Server Error. But we can set the correct HTTP status code and message for exceptions, like HTTP 404 – Resource Not Found. But for doing this we must be using the @ResponseEntity annotation. This will provide us the flexibility to make custom messages and status codes in the response header.
Using @ExceptionHandler Annotation
In this method, we declare a custom method to handle exceptions on the controller itself. The custom method will return a void and also will implement the @ExceptionHandler annotation. Here we have to map this method to the HTTP exception status and for that, we will use the @ResponseStatus annotation.
The response status annotation will take two arguments. The first argument will define the HTTP status code corresponding to the exception and the second argument defines the reason for the current exception. This message will be sent to the client in JSON /XML format as a response message.
Custom exception class with @ResponseStatus
In this method, we will create a custom exception class. This class will extend the Java exception class. When an exception occurs in the web service, the controller will throw this custom exception class. This custom exception class must be mapped to the corresponding HTTP error code. This can be done using the @ResponseStatus annotation.
Summary
As we have seen, there are different ways by which one can handle the exceptions that occur in web services. It is the choice of the developer to go with one option. There can be scenarios in which one would use a combination of all the given options. But the important task is to handle the exception properly along with providing clear information to the client.
Share
